


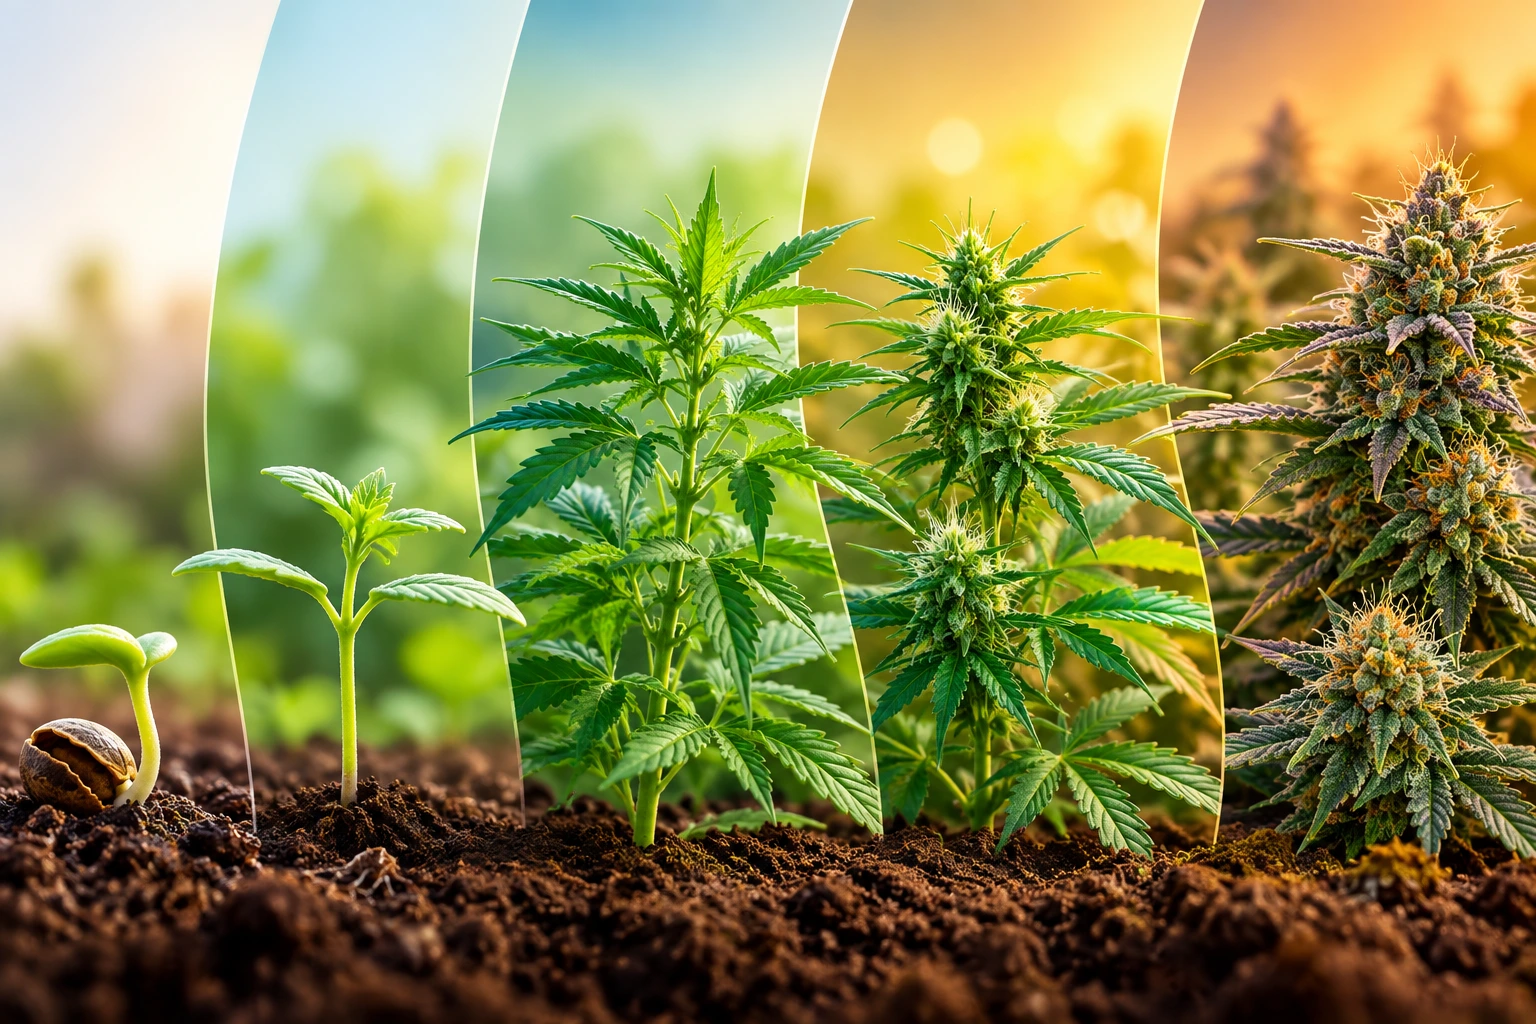
Quick Answer: The best way to avoid common mistakes during the cannabis plant life cycle is to understand what changes at each stage. Germinating seeds can be damaged by too much moisture, young seedlings are sensitive to overwatering and strong nutrients, vegetative plants can suffer from poor lighting and nutrient imbalances, and flowering plants are vulnerable to environmental stress, pests, and mold. Harvesting too early and drying or storing harvested flowers incorrectly can also affect the final quality.
Understanding the Cannabis Plant Growth Stages helps growers recognize problems early, avoid unnecessary changes, and distinguish normal plant development from signs of stress.
Growing cannabis involves more than planting a seed and waiting for the plant to mature. From germination to harvest, a cannabis plant goes through several stages, and each stage brings different challenges.
A seed needs the right conditions to begin growing. A seedling needs time to develop a healthy root system. During vegetative growth, the plant develops its stems, branches, and leaves. Flowering brings another set of changes, while harvest and post-harvest handling require careful attention to maturity, moisture, and storage.
Many problems happen when growers treat every stage in the same way. For example, watering a young seedling as frequently as a large plant can leave its roots without enough oxygen. Adding more fertilizer when leaves turn yellow can make matters worse if the real problem is damaged roots or unsuitable growing conditions.
This guide explains the most common mistakes at every cannabis growth stage, how to recognize warning signs, and what to consider before making changes. Whether you are learning about the cannabis plant life cycle for the first time or trying to understand why a plant looks unhealthy, this article will help you identify the issues that matter.
Looking for Medical Cannabis Guidance?
If you are interested in cannabis for medical purposes, learn about your options with professional guidance. California patients can complete an online evaluation and speak with a licensed physician from the comfort of home.
Why Understanding Cannabis Plant Growth Stages Matters
Cannabis plants change as they develop. Their root systems expand, their leaves become larger, and their water and nutrient needs change over time. Flowering plants also develop reproductive structures that require different care from plants that are still growing leaves and branches.
Understanding each stage helps you:
- Recognize normal growth instead of assuming every change is a problem.
- Identify signs of overwatering, nutrient stress, and poor environmental conditions.
- Avoid making several changes at once without understanding the cause.
- Understand why a problem may appear in one stage but not another.
- Recognize when mold, pests, or other issues need prompt attention.
- Understand the difference between plant maturity and a fixed growing calendar.
The timing of each stage varies depending on genetics, whether the plant is autoflowering or photoperiod-dependent, and its growing environment. Therefore, the plant’s visible development is often more useful than relying on a strict week-by-week schedule.
Overview of the Main Cannabis Plant Growth Stages
The cannabis life cycle is commonly divided into germination, seedling growth, vegetative growth, flowering, and harvest. Drying and curing follow harvest and are important post-harvest processes.
| Growth stage | What happens | Common mistakes |
|---|---|---|
| Germination | The seed absorbs moisture and the first root emerges. | Excess moisture, unsuitable temperatures, and unnecessary handling |
| Seedling | The first leaves open and the young plant begins developing. | Overwatering, strong light, and excessive nutrients |
| Vegetative | Roots, stems, branches, and leaves develop. | Poor lighting, nutrient imbalances, and ignoring pests |
| Pre-flowering | Early reproductive structures may appear. | Misidentifying normal changes and overlooking stress |
| Flowering | Flowers develop and mature. | Poor airflow, excess moisture, and nutrient problems |
| Harvest | The plant reaches maturity and is collected. | Harvesting too early or judging readiness by one sign |
| Drying and curing | Harvested material loses moisture and is stored appropriately. | Drying too quickly, poor storage, and ignoring mold |
Now, let’s examine the mistakes associated with each stage in more detail.
1. Germination Stage Mistakes
Germination is the beginning of the cannabis plant life cycle. During this stage, a seed absorbs water, its outer shell opens, and a small root called the radicle begins to emerge.
Although the seed appears simple, the conditions around it can influence whether germination proceeds successfully.
Mistake 1: Providing Too Much Water
Seeds need moisture to begin germinating, but they also need oxygen. A growing medium that remains waterlogged can limit oxygen availability and encourage seed decay.
Warning signs: The medium stays saturated for long periods, the seed becomes soft or discolored, or germination fails to progress.
What to understand: Moisture and waterlogging are not the same thing. A suitable germination environment provides enough moisture without leaving the seed surrounded by standing water.
Mistake 2: Exposing Seeds to Unsuitable Temperatures
Very cold conditions can slow germination, while excessive heat can damage the seed or create unstable conditions.
Warning signs: Germination takes longer than expected, or the seed fails to develop despite apparently adequate moisture.
What to understand: Temperature consistency matters. Different seed varieties and conditions can produce different germination times, so a delay alone does not always mean the seed has failed.
Mistake 3: Handling Germinating Seeds Too Much
Once a root emerges, it is delicate. Repeatedly opening containers, moving seeds, or touching the root can cause physical damage or expose it to drying.
What to understand: Avoid unnecessary handling and protect the emerging root from damage. Also, do not assume that every seed will germinate at exactly the same speed.
Mistake 4: Declaring a Seed Unusable Too Early
Some seeds germinate quickly, while others take longer because of their age, condition, or environment.
What to understand: Allow a reasonable observation period based on the seed supplier’s guidance and the conditions involved. However, do not leave seeds indefinitely in an unsuitable, wet, or deteriorating environment.
Key takeaway: During germination, the main concerns are moisture balance, suitable temperatures, oxygen, and gentle handling. Adding fertilizers or making repeated adjustments is usually unnecessary.
2. Seedling Stage Mistakes
After emerging from the growing medium, the plant enters the seedling stage. Its first leaves begin capturing light, while the roots establish themselves below the surface.
This is one of the most sensitive cannabis plant growth stages because a young seedling has a small root system and limited ability to recover from serious stress.
Mistake 1: Overwatering Young Seedlings
Overwatering is a common cause of seedling problems. Young plants use relatively little water, and a constantly saturated root zone can restrict oxygen and damage developing roots.
Warning signs include:
- Drooping leaves even though the growing medium is wet.
- Slow growth despite apparently suitable conditions.
- A stem that becomes weak or collapses near the growing medium.
- Persistent dampness around the roots.
How to understand the problem: Drooping does not always mean a plant needs water. Check the condition of the growing medium and the overall environment before deciding what the plant needs.
Mistake 2: Using Too Much Fertilizer
A seedling does not need the same nutrient supply as a mature plant. Some growing media already contain enough nutrients for early development.
Adding extra fertilizer without understanding the medium can create an excessive concentration of dissolved salts around delicate roots.
Warning signs: Leaf tips become brown, leaf edges appear damaged, or growth slows after feeding.
What to understand: More nutrients do not automatically mean faster growth. Consider the growing medium, existing nutrient supply, and possible root or watering problems before assuming the seedling needs fertilizer.
Mistake 3: Providing Excessive Light
Light is necessary for photosynthesis, but excessive intensity or heat can stress young leaves.
Warning signs: Leaves appear bleached, dry, curled, or unusually stressed, particularly on surfaces exposed to the light source.
What to understand: Light stress can resemble other problems, including heat stress and nutrient deficiencies. Check the light manufacturer’s guidance and the temperature around the plant rather than changing several conditions at once.
Mistake 4: Ignoring Poor Air Circulation and Excess Moisture
A persistently damp environment can encourage fungal diseases, especially when the growing medium stays wet and air movement is poor.
One serious problem is damping-off, which can cause a young seedling to collapse near the soil line.
What to understand: Keep the growing environment clean, avoid prolonged waterlogging, and pay attention to signs of stem damage or fungal growth. A collapsed seedling may not recover, so prevention is particularly important.
Mistake 5: Mistaking Normal Leaf Changes for a Disease
The first rounded seed leaves, known as cotyledons, look different from the later true leaves. They may eventually yellow and fall as the plant develops.
This can be a normal part of development rather than a sign of nutrient deficiency.
What to understand: Examine the entire plant. If new leaves are developing normally and the plant otherwise looks healthy, the loss of an older cotyledon alone may not indicate a serious problem.
Key takeaway: The seedling stage calls for careful observation. Excess water, strong nutrients, too much light, and unnecessary intervention can cause more harm than leaving a healthy seedling alone.
3. Vegetative Growth Stage Mistakes
During vegetative growth, cannabis plants develop their main structure. Roots spread through the growing medium, stems become stronger, branches form, and the plant produces additional leaves.
Problems during this stage can affect the plant’s overall health and its ability to develop normally later.
Mistake 1: Misjudging Light-Related Problems
Insufficient light can cause weak, stretched growth, while excessive light or heat can damage leaves.
Warning signs of possible light problems:
- Long, weak stems.
- Unusually wide gaps between leaves.
- Leaves that look bleached or stressed near the light source.
- Slow development despite otherwise suitable conditions.
What to understand: Stretching may indicate inadequate light, but genetics and other environmental conditions can also influence plant shape. Avoid changing light intensity based on appearance alone.
Mistake 2: Assuming Every Yellow Leaf Indicates a Nutrient Deficiency
Yellowing is one of the most confusing signs in cannabis cultivation. It can be linked to nutrient availability, root damage, watering problems, unsuitable pH, pests, or natural leaf aging.
Adding fertilizer without identifying the cause may make the problem worse.
What to understand: Look at which leaves are affected, how quickly the change occurred, whether new growth is healthy, and whether the roots and growing medium show signs of stress.
Mistake 3: Overfeeding or Using an Unsuitable Nutrient Mix
Nutrient requirements change as plants grow, but feeding too much can cause nutrient burn or interfere with the uptake of other nutrients.
Warning signs: Brown leaf tips, unusually dark leaves, curling, or a decline in growth after fertilizer application.
What to understand: Follow product instructions and consider the nutrient content of the growing medium. Avoid combining multiple products without knowing what each contributes.
Mistake 4: Ignoring the Root Zone
Healthy leaves depend on healthy roots. Compacted growing media, poor drainage, prolonged saturation, or a container that no longer provides adequate root space can interfere with development.
Warning signs: Growth stalls, the plant repeatedly droops, or the growing medium remains wet much longer than expected.
What to understand: Do not focus only on the leaves. Root health, drainage, and moisture conditions can explain symptoms that appear to be nutrient-related.
Mistake 5: Making Too Many Changes at Once
When growth slows, it can be tempting to adjust lighting, fertilizer, watering, and temperature at the same time.
This makes it difficult to determine which change helped or harmed the plant.
What to understand: Check the basic conditions first, identify the most likely cause, and make measured changes where appropriate. Keep simple notes about symptoms and environmental changes.
Mistake 6: Overlooking Pests
Pests may appear during vegetative growth and continue into flowering. Some are difficult to see without close inspection.
Possible warning signs:
- Small pale dots or stippling on leaves.
- Fine webbing.
- Irregular holes or damaged leaf edges.
- Tiny insects or eggs on the underside of leaves.
What to understand: Inspect leaves and stems regularly. Identify the pest before selecting a treatment, and use products only as labeled and appropriate for the intended crop and growth stage.
Key takeaway: Vegetative growth is not simply about producing more leaves. Balanced nutrition, healthy roots, appropriate light, and early pest detection all contribute to normal development.
4. Pre-Flowering Stage Mistakes
Pre-flowering is the transition between vegetative growth and full flowering. During this period, the plant may begin showing reproductive structures, and its growth pattern may change.
Not every plant follows the same timetable. Genetics and whether the plant is photoperiod-dependent or autoflowering affect when these changes appear.
Mistake 1: Misidentifying Normal Development
Changes in leaf shape, branching, or the appearance of early reproductive structures may be mistaken for disease or abnormal growth.
What to understand: Consider the plant’s age, variety, and overall condition before concluding that a change is harmful.
Mistake 2: Assuming Every Plant Follows the Same Timeline
A calendar that describes one variety may not accurately describe another. Some plants mature more quickly, while others take longer to develop.
What to understand: Use stage descriptions as general guidance rather than fixed deadlines. Look for visible developmental changes and account for genetic differences.
Mistake 3: Ignoring Signs of Stress During the Transition
A plant that is already experiencing root problems, nutrient imbalance, or pest damage may struggle as it enters a new developmental phase.
What to understand: Do not assume that a change in growth automatically means the plant needs more fertilizer or a different treatment. Review the plant’s recent history and overall health.
Key takeaway: Pre-flowering is a period of transition. Recognizing normal development and avoiding unnecessary interventions can help prevent confusion and additional stress.
5. Flowering Stage Mistakes
During flowering, the plant develops its reproductive structures. Female cannabis plants may produce flowers with visible pistils, while male plants produce pollen-bearing structures.
Flower development is affected by genetics, environmental conditions, plant health, and the length of the flowering period. This stage also brings concerns about mold and other problems that may be harder to address once flowers become dense.
Mistake 1: Allowing Excess Moisture and Poor Airflow
High moisture levels and stagnant air can create conditions that favor fungal growth. Dense flowers can be especially vulnerable because moisture may remain trapped inside them.
Warning signs:
- Gray, white, or unusual fuzzy growth.
- Brown or decaying areas inside flowers.
- A musty smell that differs from the plant’s normal aroma.
- Plant tissue that appears wet or breaks down unexpectedly.
What to understand: Inspect the plant carefully and pay attention to the conditions around it. Suspected moldy material should not be consumed. Avoid simply removing the visible part and assuming the rest is safe.
Mistake 2: Treating Flowering Like Vegetative Growth
A plant’s needs and priorities change as it develops flowers. Continuing the same management approach without considering the new stage can create avoidable stress.
What to understand: Evaluate nutrients, environmental conditions, and plant health in the context of the current stage. Avoid abrupt changes based on generic advice intended for a different phase.
Mistake 3: Ignoring Light-Schedule Differences
Photoperiod-dependent cannabis varieties use changes in day length to regulate flowering. Autoflowering varieties generally flower according to their development and genetics rather than relying on the same light-trigger mechanism.
What to understand: Understand the type of plant before interpreting flowering behavior. Unexpected changes in flowering may have different explanations depending on the variety and growing environment.
Mistake 4: Continuing to Ignore Nutrient Stress
Excessive fertilizer, unsuitable nutrient balance, and problems in the root zone can continue to affect plants during flowering.
Warning signs: Damaged leaf tips, widespread yellowing, curling, or unusual leaf discoloration.
What to understand: Do not automatically add more nutrients when leaves change color. Root problems, natural aging, pests, and environmental stress can produce similar symptoms.
Mistake 5: Overlooking Pests and Damaged Flowers
Pests do not disappear when flowering begins. Some may damage leaves or flowers, while others can contribute to contamination.
What to understand: Inspect plants regularly, paying attention to hidden areas and the undersides of leaves. Use only appropriate, labeled treatments and consider whether a product is suitable for flowering plants.
Mistake 6: Judging Flower Health by Appearance Alone
Large or colorful flowers are not necessarily mature or healthy. Genetics influence flower size, color, and shape, and visible appearance alone cannot establish chemical composition or safety.
What to understand: Evaluate maturity using multiple relevant indicators and reliable information about the variety. Avoid assuming that one visual sign tells the whole story.
Key takeaway: During flowering, pay particular attention to moisture, airflow, pests, nutrient balance, and signs of disease. Mold and contamination deserve prompt attention because they can affect the safety of harvested material.
6. Harvest Stage Mistakes
Harvest marks the end of the plant’s active growth cycle. However, deciding whether a plant is mature enough to harvest can be difficult, particularly for beginners.
There is no single harvest date that works for every variety. Genetics, environmental conditions, and the plant’s developmental progress all affect maturity.
Mistake 1: Harvesting Too Early
A fixed calendar or an impatient decision can lead to harvesting before the plant has reached the expected stage of maturity.
What to understand: Consider the variety’s typical flowering period alongside multiple signs of maturity. A general timeline is a reference point, not proof that a particular plant is ready.
Mistake 2: Waiting Too Long Without Checking Plant Health
Waiting longer does not always improve the result. Overmature or deteriorating flowers may be more vulnerable to damage, while mold and other problems can develop if environmental conditions are poor.
What to understand: Assess maturity and plant health together. Do not extend the growing period solely because a calendar or generic guide recommends doing so.
Mistake 3: Relying on One Visual Indicator
Pistil color, flower appearance, and trichome development are sometimes used to assess maturity. However, these indicators can vary with genetics and growing conditions.
What to understand: Avoid basing a harvest decision on a single sign. Understand the limits of visual assessment, and do not confuse appearance with verified cannabinoid content or product safety.
Mistake 4: Using Unclean Tools or Handling Material Carelessly
Dirty tools, contaminated surfaces, and careless handling can introduce unwanted material or damage harvested flowers.
What to understand: Keep tools and work surfaces clean, handle plant material carefully, and avoid mixing healthy material with anything suspected of contamination.
Key takeaway: Harvest timing should reflect actual plant maturity and health, not impatience or a fixed date. Clean handling is also important for maintaining quality.
7. Drying and Curing Mistakes
The cannabis plant growth stages do not end in a practical sense when the plant is harvested. Post-harvest handling can influence aroma, texture, stability, and the risk of mold.
Drying and curing are different processes. Drying removes moisture, while curing involves controlled storage after initial drying. Neither process makes moldy or contaminated material safe.
Mistake 1: Drying Too Quickly
Excessive heat or very dry conditions can cause the outside of the harvested material to dry faster than the inside. This may affect texture and aroma.
What to understand: Conditions should be controlled and consistent. Avoid relying on intense heat or other shortcuts to speed up the process.
Mistake 2: Allowing Material to Remain Too Damp
Material that retains too much moisture can support mold growth, especially when stored in a poorly ventilated or unsuitable environment.
Warning signs: Visible mold, a musty smell, unusual discoloration, or signs of decay.
What to understand: Do not package material before it is appropriately dried. If mold is suspected, do not consume the material or assume that additional drying or curing will make it safe.
Mistake 3: Treating Curing as a Way to Fix Poor-Quality Material
Curing cannot reverse every problem caused by poor growing conditions, contamination, or incorrect drying.
What to understand: Good post-harvest practices help preserve quality; they do not repair damaged or unsafe material.
Mistake 4: Storing Material in Unsuitable Conditions
Exposure to excess moisture, heat, light, or air can affect the stability and quality of stored cannabis.
What to understand: Storage conditions should limit moisture-related risks and unnecessary environmental exposure. Keep material in appropriate, secure storage and away from children and pets.
Key takeaway: Drying and curing require attention to moisture and cleanliness. A successful harvest can still be compromised by poor post-harvest handling.
Common Cannabis Growing Problems and What They May Mean
The following table offers a quick reference for common symptoms. These signs are not definitive diagnoses because several different problems can produce similar changes.
| Symptom | Possible explanations | What to check first |
|---|---|---|
| Seed does not sprout | Poor seed viability, unsuitable moisture, temperature issues | Germination conditions and elapsed time |
| Seedling droops | Water stress, root stress, heat, or excessive light | Growing-medium moisture and surrounding conditions |
| Leaves turn yellow | Nutrient imbalance, root problems, natural aging, or other stress | Which leaves are affected and how quickly the change occurred |
| Leaf tips turn brown | Excess nutrients, salt buildup, or environmental stress | Recent feeding and growing-medium conditions |
| Plant grows slowly | Root stress, light issues, pests, or unsuitable conditions | Recent changes and overall plant health |
| Stems become unusually long | Insufficient light or natural growth differences | Light conditions and the plant’s developmental stage |
| Leaves show tiny pale spots | Possible mites or other pests, or environmental damage | Leaf undersides and visible pest evidence |
| Flowers show mold-like growth | Possible fungal contamination | Affected areas and environmental moisture |
| Plant flowers at an unexpected time | Genetics, plant type, maturity, or light-related factors | Variety and growing conditions |
| Harvested material smells musty | Possible mold or improper storage | Material condition and storage history |
Mistakes to Avoid Throughout the Entire Cannabis Life Cycle
Some errors can affect cannabis plants at almost any stage. Recognizing these patterns helps prevent repeated problems.
1. Following a Fixed Calendar Without Observing the Plant
Growth timelines are useful for planning, but plants do not all develop at the same rate.
Better approach: Use the calendar as a guide and compare it with visible developmental changes and the plant’s overall health.
2. Changing Too Many Conditions at Once
Changing water, nutrients, lighting, and temperature simultaneously makes it difficult to identify the cause of a problem.
Better approach: Review the evidence, identify the most likely cause, and make measured changes rather than reacting to every symptom.
3. Confusing Symptoms With Causes
Yellow leaves, drooping, and slow growth are symptoms rather than diagnoses. The same symptom may have several different causes.
Better approach: Examine the whole plant, the growing medium, recent care, and the surrounding environment before choosing a response.
4. Ignoring Cleanliness and Pest Prevention
Dirty tools, contaminated material, and unnoticed pests can create problems that become harder to manage over time.
Better approach: Maintain clean equipment, inspect plants regularly, and respond to confirmed problems using appropriate methods.
5. Ignoring Local Laws and Safety Requirements
Cannabis cultivation and possession laws vary by location. Some jurisdictions restrict cultivation entirely or impose limits based on age, plant count, licensing, or other conditions.
Better approach: Check the current laws that apply to your location before growing cannabis. Do not assume that rules in one state or country apply elsewhere.
Frequently Asked Questions
1. What are the main Cannabis Plant Growth Stages?
The main stages are germination, seedling growth, vegetative growth, flowering, and harvest. Drying and curing follow harvest. Some guides separate pre-flowering and different parts of flowering into additional stages.
2. What is the most common mistake during cannabis seedling growth?
Overwatering is a frequent mistake because young seedlings have small root systems and use relatively little water. However, poor lighting, unsuitable temperatures, and excessive nutrients can also cause problems.
3. Why are my cannabis plant leaves turning yellow?
Yellow leaves can result from nutrient imbalances, watering problems, damaged roots, pests, natural aging, or environmental stress. Check the location and pattern of the yellowing before assuming that fertilizer is needed.
4. Can overwatering affect every cannabis growth stage?
Yes. Excess moisture can restrict oxygen around the roots at different stages. Young seedlings are particularly vulnerable, but mature plants can also experience root problems when the growing medium remains waterlogged.
5. How can you tell whether a cannabis plant is stressed?
Possible signs include drooping, unusual leaf discoloration, curling, damaged leaf tips, slow growth, and visible pest damage. Because these signs can have multiple causes, the plant’s overall condition and growing environment should be assessed together.
6. Why is my cannabis plant growing slowly?
Slow growth may be associated with root stress, unsuitable light or temperature, watering problems, nutrient imbalance, pests, or genetics. Compare the plant’s current condition with its earlier development instead of assuming that one specific deficiency is responsible.
7. Can you fix nutrient burn by adding more fertilizer?
No. Nutrient burn can be a sign that the plant has received excessive nutrients or accumulated salts. Adding more fertilizer may worsen the problem. Review the feeding history and growing-medium conditions before deciding what to change.
8. Why is mold a serious problem during flowering?
Dense flowers and excess moisture can create conditions that support mold. Contaminated material may pose health risks, so suspected moldy cannabis should not be consumed or treated as safe simply because the visible growth has been removed.
9. Does every cannabis variety follow the same growth timeline?
No. Development varies with genetics, plant type, environmental conditions, and the length of different growth phases. A week-by-week guide should be treated as an estimate rather than a universal schedule.
10. Can drying and curing correct mistakes made during growth?
No. Proper post-harvest handling can help preserve quality, but it cannot reliably reverse contamination, mold, or all damage caused during cultivation. Material suspected of being unsafe should not be consumed.
11. What is the biggest mistake to avoid during the cannabis plant life cycle?
There is no single mistake that causes every growing problem. However, reacting to symptoms without identifying their cause can lead to repeated errors. Careful observation, balanced environmental management, and attention to plant health are useful throughout the life cycle.
12. What should you do if a cannabis plant suddenly looks unhealthy?
Look for recent changes in watering, nutrients, temperature, light, and the growing environment. Check for pests, root problems, or signs of disease. Avoid making several drastic changes at once, and seek qualified guidance when the cause remains unclear or a contamination risk is suspected.
Final Thoughts
Understanding the Cannabis Plant Growth Stages makes it easier to recognize normal development, identify potential problems, and avoid mistakes caused by guesswork. Each stage has its own challenges, from protecting a germinating seed to recognizing stress during flowering and handling harvested material safely.
The most useful habit is to observe the whole plant rather than reacting to one symptom. Drooping does not always mean a plant needs water, yellow leaves do not always mean it needs fertilizer, and a fixed calendar does not guarantee maturity.
By learning how the cannabis plant life cycle works, recognizing common growing mistakes, and paying attention to environmental conditions, readers can better understand why problems occur and why prevention is often more effective than trying to correct damage later.
Sources
- Cannabis cultivation and plant biology information from the University of California Agriculture and Natural Resources
- Cannabis and cannabis cultivation information from the California Department of Cannabis Control
- Cannabis cultivation resources from the University of Vermont Extension
- Cannabis research and scientific information from the National Center for Complementary and Integrative Health
- Cannabis information from the Centers for Disease Control and Prevention